Using MSSQL for Overseer’s database
One of the new features in Overseer 5.x, is support for using Microsoft SQL for Overseer’s database. Overseer already supported, and continues to support database monitoring, but this feature is different. Normally, Overseer uses a SQLite file-based database, stored on the local file system. This works quite well, but some people with very large data needs, or those that want easier access to the data for reporting purposes, would prefer to use MSSQL. You can use Microsoft SQL Express, Standard, Data Center, MSDE, etc.– any version of MSSQL except Microsoft SQL CE should work.
Overseer 5.x includes an optional MSSQL add-on module that allows Overseer to use MSSQL as the Overseer database. If you’ve purchased the module and would like to configure MSSQL, this blog post will show you how. If you need to purchase the module, it’s available on this page:
http://www.overseer-network-monitor.com/UpgradePricing.aspx
Creating the database:
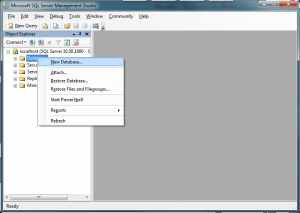
First, create a database in MSSQL. This can be done in Microsoft SQL Server Management Studio by right clicking on ‘Databases’ and selecting ‘New Database’:
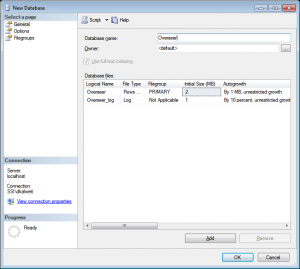
Name the database whatever you want. I am using ‘Overseer’ in the example below:
Database Login
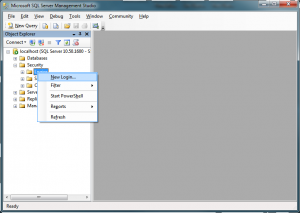
Next, you must create a database login. You can do so in MSSQL Management Studio by going to Security->Logins, right clicking, and choosing ‘New Login’:
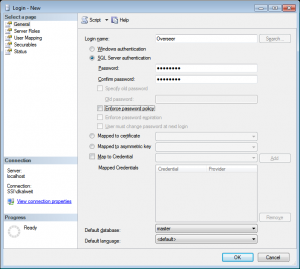
Create a login such as the one below, named ‘Overseer’. I’ve used SQL authentication, but you can use Windows authentication if you’d rather. I do not cover the steps involved in setting up Windows authentication in this blog post.
Creating the database user
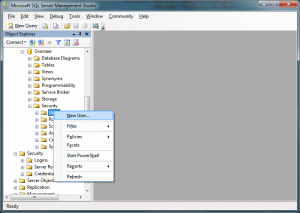
Now that we’ve created the database and the server login, we must create the database user. To do this, expand the database, down to Security->Users, and right click and select ‘New User’:
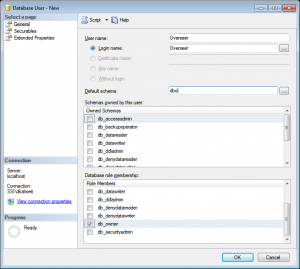
Create the user with the name ‘Overseer’, select the login we created below, set the ‘Default schema’ to dbo, and check “db_owner’ in the ‘Database role membership’ section only:
Overseer Configuration
Now that we have the database created, the MSSQL login created, and the database user created with the appropriate permissions, it’s time to point Overseer to this database. If you plan to upgrade your existing Overseer database, please back it up using the Backup and Restore wizard first. We’ll be restoring it after.
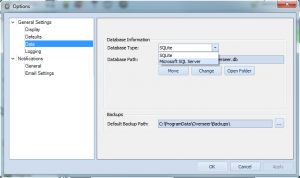
First, go to Tools->Options, and then choose General Settings->Data. Select ‘Microsoft SQL Server’ from the ‘Database Type’ dropdown:
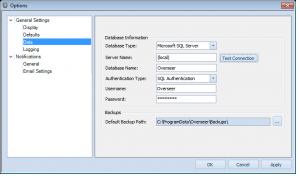
Once Microsoft SQL Server is selected, you’ll be presented with different options. Please enter in the appropriate values– you can use (local) for the MSSQL server if it is installed on the same computer as Overseer– otherwise, enter the server name. For the database name, enter the database we created above. The user is the login name we created above, and the password is the password you used for the MSSQL login:
Click ‘Test Connection’ to make sure things are setup, and then click OK.
At this point, Overseer should be using the new MSSQL database. If you backed up your old database, you can restore it now using the Backup and Restore wizard. Otherwise, you should have a clean, empty database that you can start filling. It may be helpful to use the resource discovery wizard for this purpose.
